
Sculpting Alien Skin ( Greenstuff Tutorial)
Introduction
This small sculpting tutorial will be showcasing some tips on how to create a very simple alien skin texture that can be used in various projects, from chaos creatures, lizardmen to Tyranids.
Step 1 ( things you will need) (pic1)
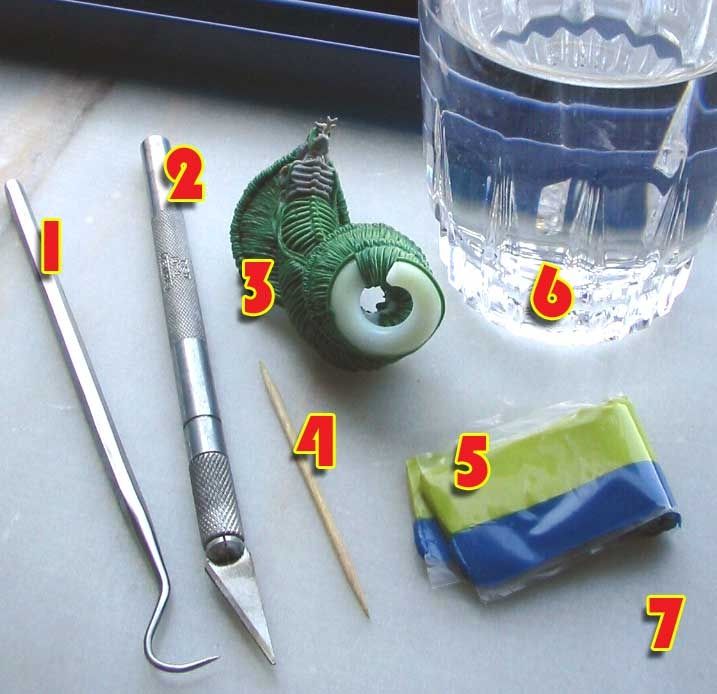
1- Sculpting tool
2- Hobby knife ( cutter)
3- Miniature or structure to apply textured skin
4- Toothpick
5- Modeling putty (green stuff)
6- Water
7- Flat surface
Patience
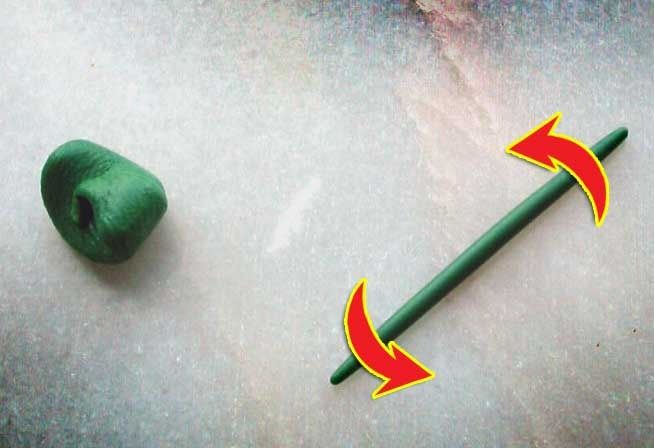
Step 2 (handling green stuff)
- Cut a bit of green stuff (GS) and mix it, more yellow is better for detail work but it takes more time to cure and is also extremely sticky, more blue has the opposite effect.
- In a flat area stretch, roll the GS until you reach the desired shape and size (pic2)
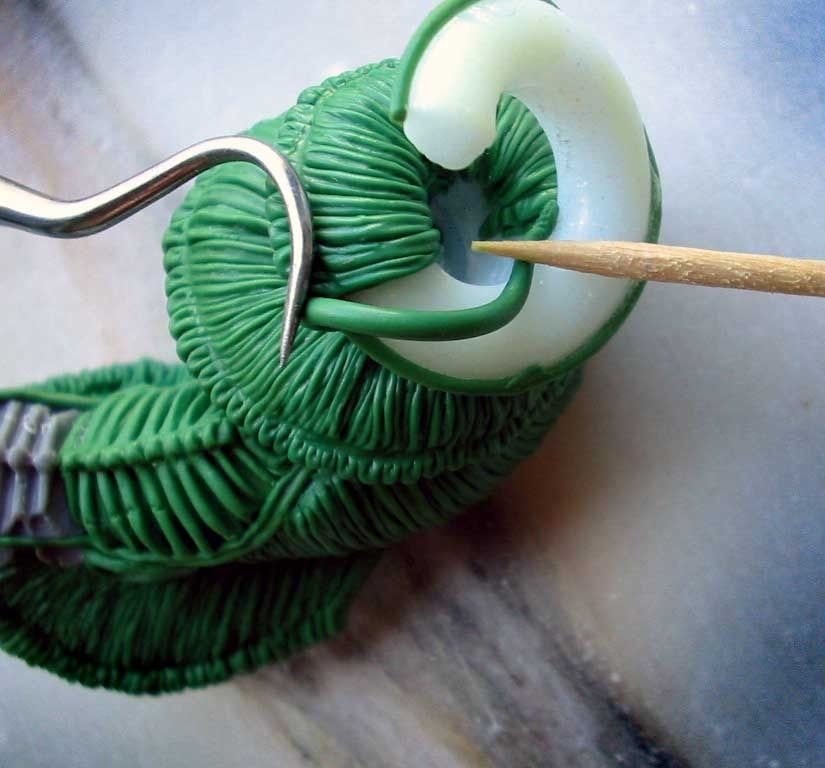
- Apply it directly on the miniature (I created a fimo swirly structure)
- Use the toothpick and sculpting tool to handle the GS, both should be dipped in water to avoid GS sticky properties (pic3)
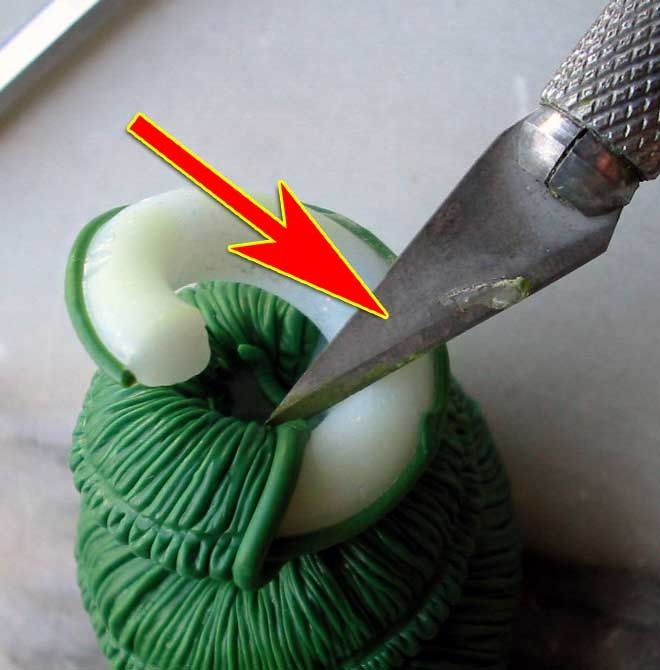
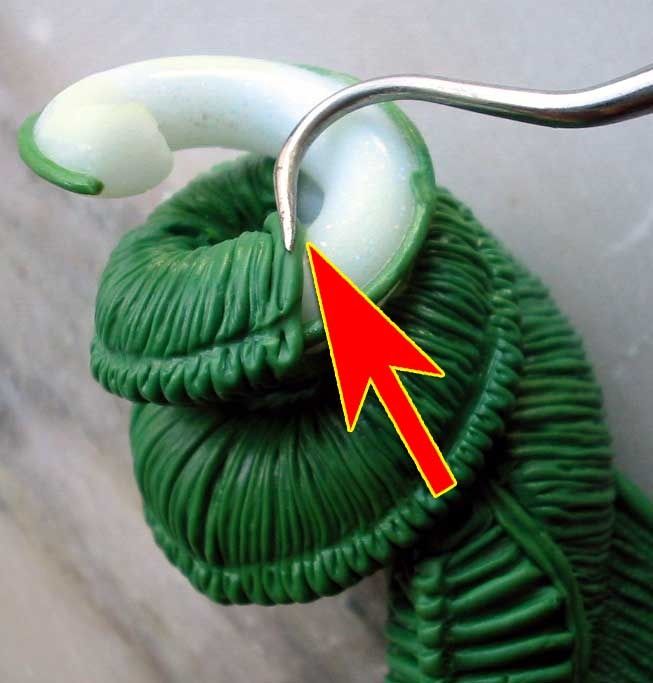
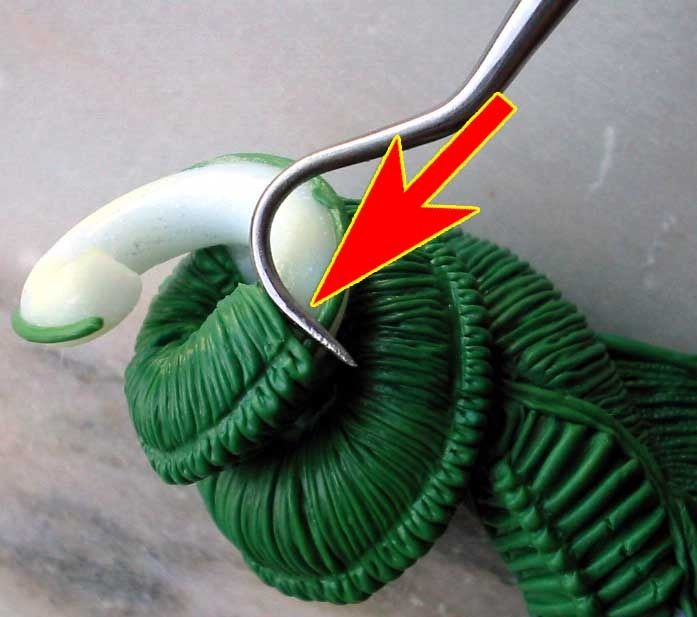
Step 3 ( Texturing)
- Reshape the GS to fill the interior structure or miniature and cut the excess (pic4)
- With sculpting tool carve some parallel lines gently on GS (pic5)
- Finally push it towards previous GS module in order to create space for next one (pic6)
Conclusion
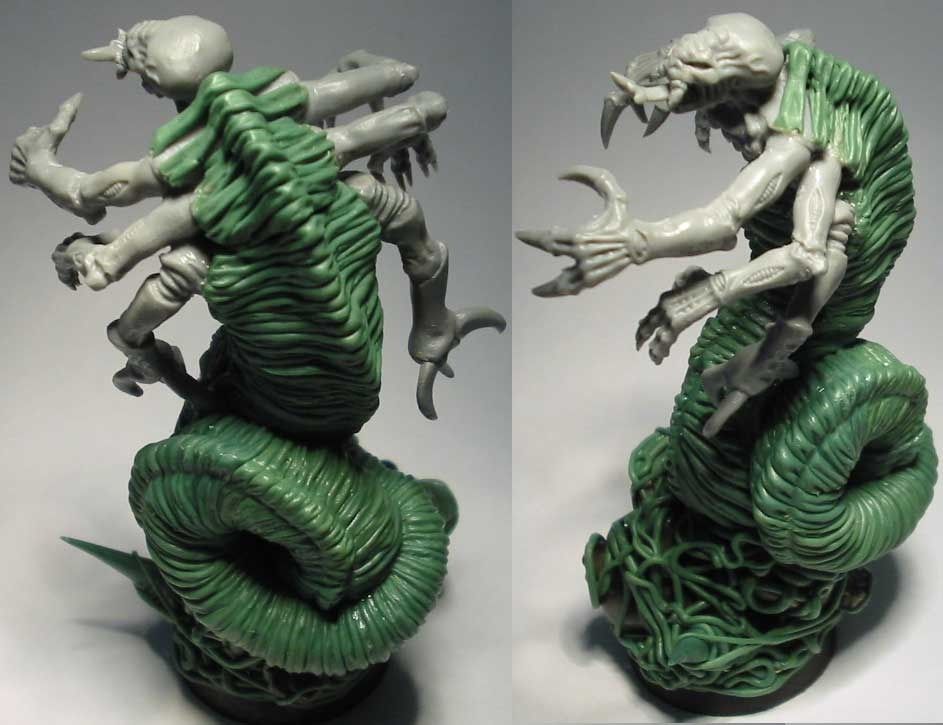
Now that you have done the first module of the skin you just need to repeat the same steps several times in order to cover all the desired surface. The reason why I choose to make the skin in small modules and not all at once is due to the fact you will have more control over the skin sculpting and also makes the texture itself much more interesting. I hope these tips will help you all on your future sculpting projects.
Final result.
Have fun Greenstuffing.
Excellent Tutorial!
ReplyDeleteExcellent Tutorial!
ReplyDeleteThanks Eli! More to come soon.
ReplyDeleteGreat tutorial. The end product, as seen in the last pic, is superb.
ReplyDeleteGlad you liked it Finch. If time permits I will upload some more next weekend.
ReplyDeleteYeah... this looks awesome. I don't know if I'd have the patience to do an entire large tail like you do, but that's what separates "sculptors" from "mooks with putty" (well that, and skill).
ReplyDeleteIncidentally, where do you get your greenstuff, and have you seen it available in larger amounts than the strips shown in the first pic? Thanks :)
Hi mate I usually get my GS in huge strips from Trolltrader store at Salute show ( good price) and if your after some big tubes of the freshest GS I get those at Heresy miniatures.
ReplyDeleteHeresy you say? Gracias!
DeleteI ended up ordering from The War Store, don't know how fresh it is but they had both GS and ProCreate. Better price than Heresy too...
DeleteNice! THe warstore has plenty of exposure so Im sure that the GS there moves fast and its fresh. Do you use procreate too?
DeleteI've never actually used it but I've seen a variety of sculpts lately using it, apparently it holds sharper edges etc. than green stuff. 15 mm sci-fi sculptor Eli Arndt uses it a lot and I like his sculpts.
Delete