Thursday 23 July 2015

Finding your center


Its time for some summer vacations back home in Portugal, hopefully I will recharge and get away from my so stressful work. When I come back I will update this blog with something very old and very special that I did many years ago and its still my biggest commission ever. Now I need some sun on my old bones, take a step back and think about my life. Talk to you all soon.

Sunday 19 July 2015

Age of Sigmar rebasing or not?

After many months reading all the rumours about the major changes to Warhammer Fantasy Battles I finally got to the point that a decision needed to be made.

I have lots of WFB miniatures set in square bases and arranged in regiments but Age of Sigmar (AoS) introduced a new direction for my armies. Now the regiment formations are no more and the bases switched to circular. Humm not happy with that  for several reasons:

1- Rebasing finished modeling projects is not what I would call fun time.
2-  If I break the regiment formation and go circular bases for my miniatures they will no longer be compatible with previous editions of WFB or other companies emergent games.
3- It costs money to rebase hundreds of miniatures

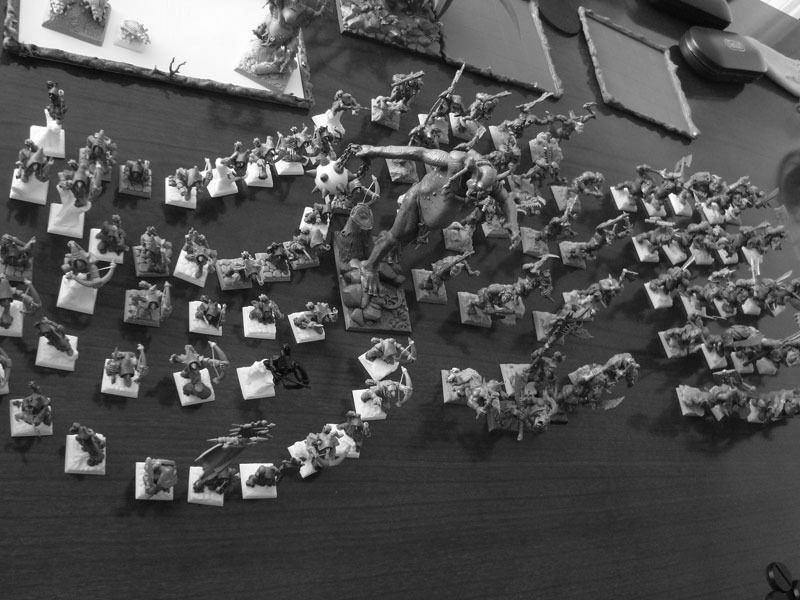
So yes, I was inclined to leave them all in square bases and get on with it... well that was before I set some miniatures on the table in a skirmish arrangement.


Ouch that looks wrong in so many ways, its just a visual mess.
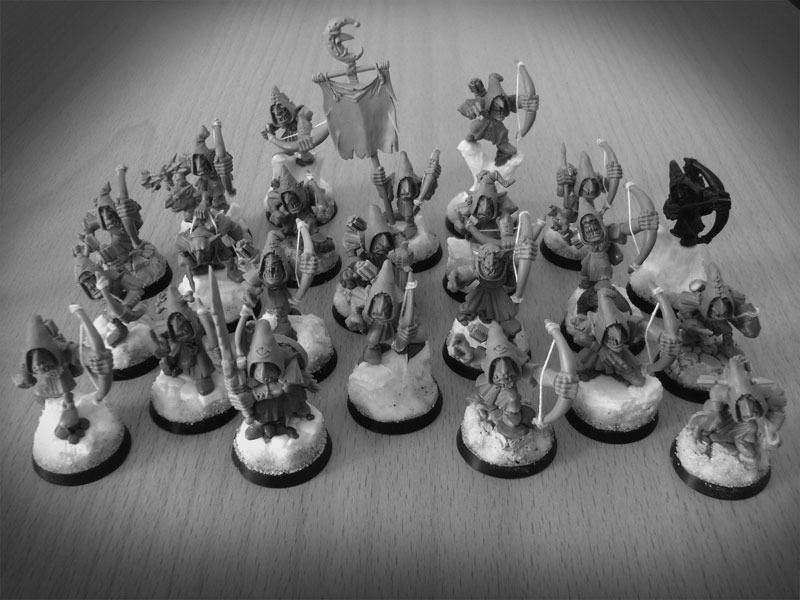
I got myself some 25mm circular bases to see the total footprint of my goblin archers regiment.


Its going to take more space on the table thats for sure.
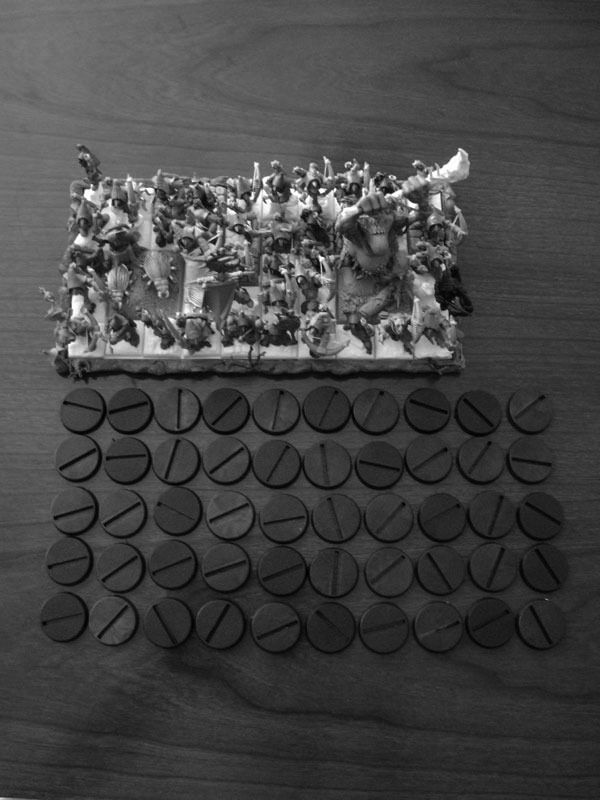
When I dispersed my regiment I noticed that the unit fillers that I used would take the space of 10 models so effectively my 50 gobbo regiment was actually just 40 gobbos, a troll and some beetles.
Thing is, in AoS makes no sense to have these unit fillers. The nature of the skirmish game renders these fillers redundant. So I dropped them.


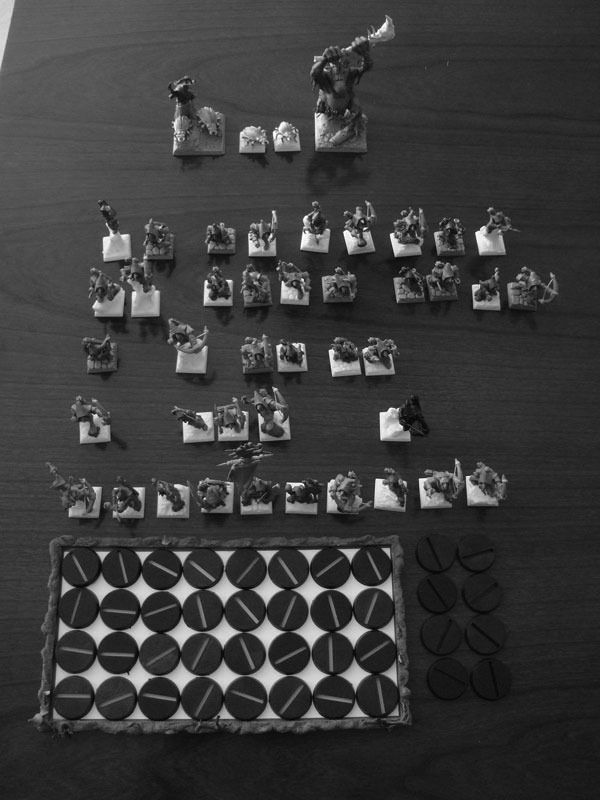
By now I only  have 40 goblin archers, no cool fillers and some horrible pointy square bases in loose formation... Not a good starting point. What to do? Call it a day and do the clever thing and dont change a thing, thats what I should have done. But I didn't, I had the urge to rebase it all and so I got my heavy tools and butchered some squares, here is the results.


Since this is skirmish now I broke the unit in 2 smaller and more manageable detachments, luckily enough I had both old school and new models mixed into the archers so the obvious choice for clarity sake on the table was to divide them by edition. 

One unit of the old farts ( they also gained an extra standard and musician):


and one unit of the new gobbos.


So the impulsive blind decision prevailed in the end and I will go AoS all the way, in the process I will rebase my armies. Lost my fillers but gained 1 extra unit with standard and musician. 
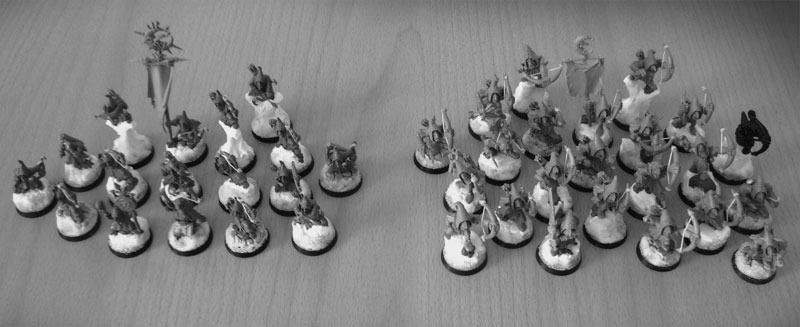
They do look nice in little circles.


Saturday 11 July 2015

Concept art for future sculpting projects.

This update will take me into one side of the sculpting that is not always visible, specially when you  only just see the final greens.
When I sculpt most of the times I have a clear idea on my mind and I will create a loose interpretation of that in putty, although sometimes I need to develop ideas to a more accurate degree. This is when a pencil and paper will have a role in the sculpting.

I was always into drawing and I find it very rewarding to simply drift away sketching concepts all night, sometimes even at work. You never know when an idea will pop up in your head so its better to always be prepared with a piece of paper and something to scribble it.

Lately I have been thinking about  my Tyranids and Killteams... I want to sculpt some alternative monsters and there are a few ideas that I want to explore, nothing too radical... this is what I have doodled so far.

Cthulhu octopus thing


Brainy one


worm head bugger


weird thing


I will give it a go on the worm one and the popular Cthulhu, thing is these little exercises always give me a good starting point. Doing some concept art is quite creative and most of the times I end up with more ideas than I first anticipated so its all good. Sculpting, drawing and painting are all part of our hobby and I enjoy each single one of those things.
So there you go, even if the final result is not the best I already had loads of fun each step of the way.


Sunday 5 July 2015

Tutorial Sculpting Crab Legs


Introduction
Another little tutorial for my bugs, this time we will concentrate on sculpting Crab legs that can be very valuable for different projects, from crustaceans to insect segmented legs or just a nasty chaos mutations.

Step 1 (things you need) Picture 1


Modeling putty (green stuff)
Water
Hobby knife (cutter)
Pin vice
Clay shaper brush
Sculpting tool
Paper clips
Toothpick
Flat surface

Step 2 (structure) Picture 2


Start with a strong internal structure, I used a paper clip and bended it to the desired shape. Picture 2a

Mixed a bit of green stuff and applied it directly to the clip, at this point no precautions with smooth or clean green stuff areas are needed. This is just a WIP shape of the final crab leg. Picture 2b


Step 3 (smooth shapes)

After the green stuff is cured its time to start building the final shape, so I mix a bit of the paste and apply it to the structure. It’s better to work on one side of the structure and let it dry before going for the other half, so I started with the left side of the crab leg. Picture 3


Used the clay shaper brush dipped in water and started smoothing the edges of the green stuff, take your time here and use always plenty of water. Picture 4


So, when left side is sculpted and smoothed just let it dry and only then, go for the right side. You can sculpt the shape you wish but avoid it looking too uniform, it’s a crustacean leg so irregular shapes work best. You should now have something like this. Picture 5


Step 4 (spikes and final contour) Picture 6


And the fun begins, while the stress of waiting for curing times is growing on you we can use one of those endless curing breaks to sculpt some little spikes, do some random sizes and shapes. And for those that say crabs don’t have spikes on legs I say… who cares it looks great. ;) Picture 6a

I hope everyone knows how to sculpt spikes but for the newt sculptors here is how I do them. Do one little ball of green stuff and put it on a flat surface, then dip fingers on water and start pressing green stuff against surface with vertical movements, just let it dry. Piece of cake. Picture 6b

Now, with all stuff cured, choose one cool spike and mix a ball of green stuff... lets use its sticky properties, for “gluing” the spike to the leg. Picture 7


For better blending the spike to the crab leg lay a layer of green stuff over the junction Picture 8a


And for final smoothing use a clay shaper brush dipped in water. Picture 8b

Lets move to the final claw spike and this time we will use the paper clip extremity for a stronger structure. First with a cutter do a cut on another spike and then use a pin vice to do a small hole in it. Mix a bit of green stuff and squeeze the spike against it passing the hole on to the paper clip. This should make a stronger bond, but before you finish you need to smooth the greenstuff with a clay shaper dipped in water. Picture 9


Step 5 (Texture)

With all shapes finished its time for texturing those legs. I started by putting some spikes on the legs, since you already sculpted several spikes just cut them to the desired size and use green stuff for gluing them to the leg. In this process I use mainly sculpting tools and a toothpick dipped in water to sculpt the junction of the spike to the leg. You could also use pins but since the spikes are small there’s no need for that. Picture 10


Almost there, now simply cut several random sized balls of green stuff and again with the help of a toothpick and sculpting tool stick and smooth them randomly on the crab leg, also try to make the balls on the leg interesting and natural. Picture 11


Conclusion Picture 12


Well that’s it, you can now sculpt some crab legs for your projects, funny thing I noticed was that the smaller legs look like scorpions tails… hope you enjoyed it.


This was another old tutorial that I managed to salvage from my old site, more to come.