Introduction
Another little tutorial for my bugs, this time we will concentrate on sculpting Crab legs that can be very valuable for different projects, from crustaceans to insect segmented legs or just a nasty chaos mutations.
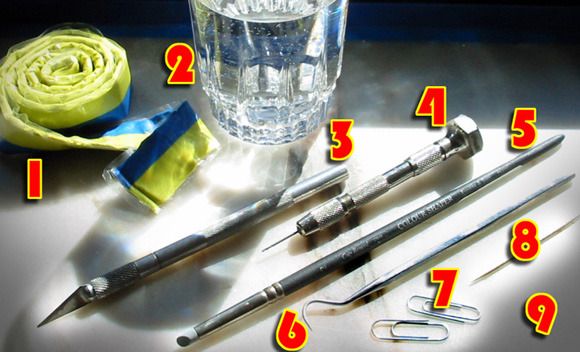
Modeling putty (green stuff)
Water
Hobby knife (cutter)
Pin vice
Clay shaper brush
Sculpting tool
Paper clips
Toothpick
Flat surface
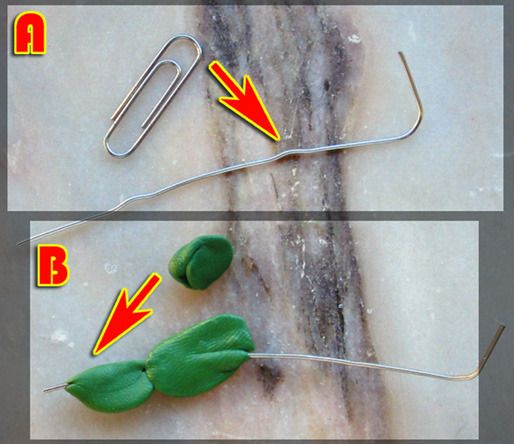
Start with a strong internal structure, I used a paper clip and bended it to the desired shape. Picture 2a
Mixed a bit of green stuff and applied it directly to the clip, at this point no precautions with smooth or clean green stuff areas are needed. This is just a WIP shape of the final crab leg. Picture 2b
Step 3 (smooth shapes)
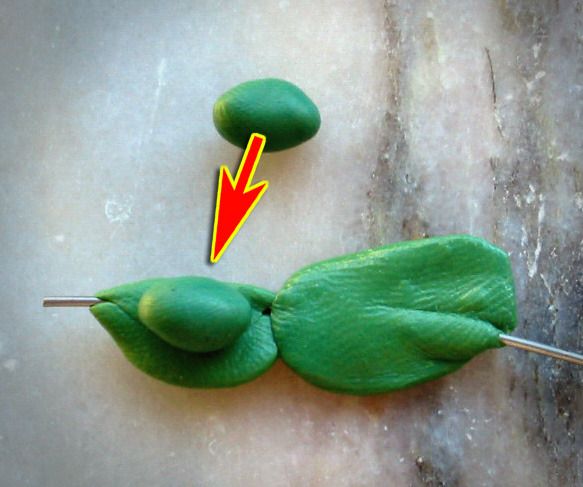
After the green stuff is cured its time to start building the final shape, so I mix a bit of the paste and apply it to the structure. It’s better to work on one side of the structure and let it dry before going for the other half, so I started with the left side of the crab leg. Picture 3
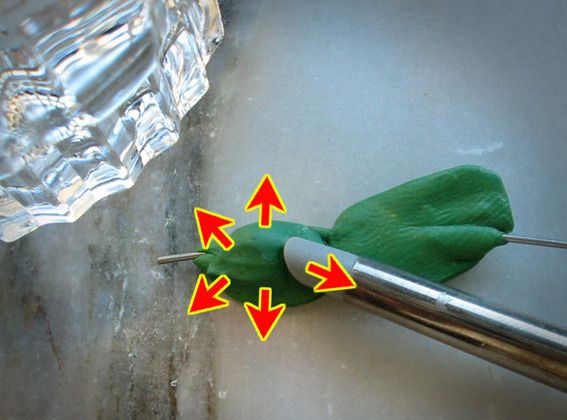
Used the clay shaper brush dipped in water and started smoothing the edges of the green stuff, take your time here and use always plenty of water. Picture 4
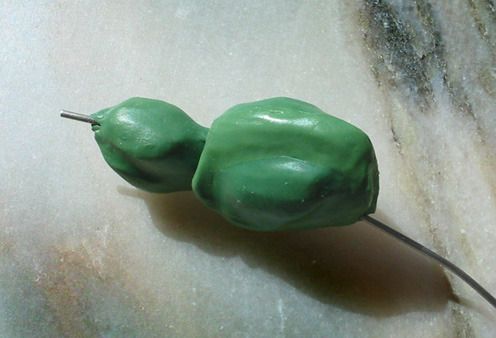
So, when left side is sculpted and smoothed just let it dry and only then, go for the right side. You can sculpt the shape you wish but avoid it looking too uniform, it’s a crustacean leg so irregular shapes work best. You should now have something like this. Picture 5
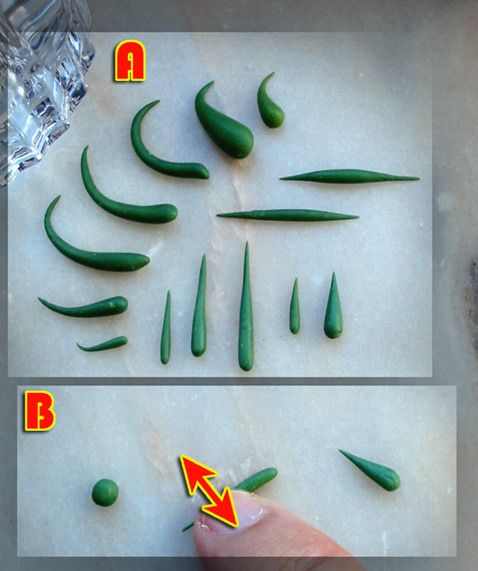
And the fun begins, while the stress of waiting for curing times is growing on you we can use one of those endless curing breaks to sculpt some little spikes, do some random sizes and shapes. And for those that say crabs don’t have spikes on legs I say… who cares it looks great. ;) Picture 6a
I hope everyone knows how to sculpt spikes but for the newt sculptors here is how I do them. Do one little ball of green stuff and put it on a flat surface, then dip fingers on water and start pressing green stuff against surface with vertical movements, just let it dry. Piece of cake. Picture 6b
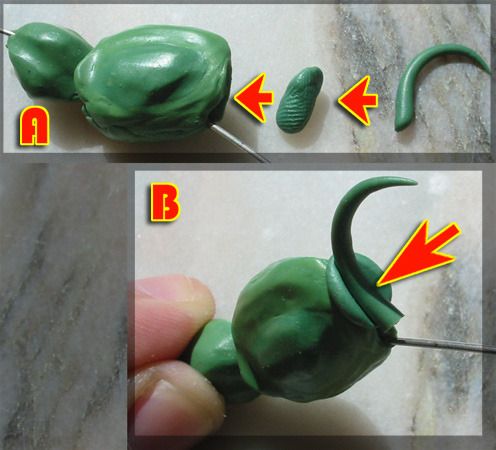
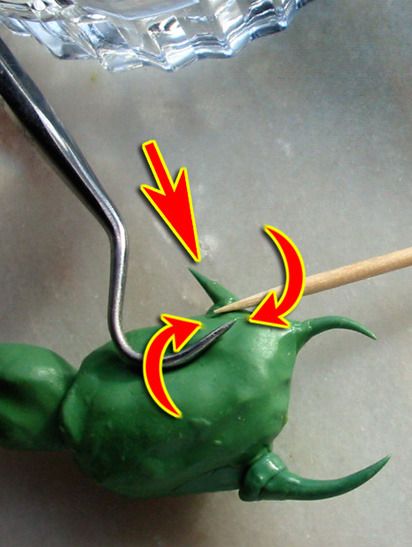
Now, with all stuff cured, choose one cool spike and mix a ball of green stuff... lets use its sticky properties, for “gluing” the spike to the leg. Picture 7
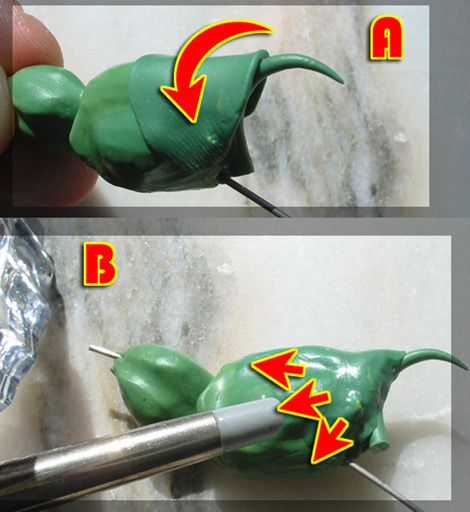
For better blending the spike to the crab leg lay a layer of green stuff over the junction Picture 8a
And for final smoothing use a clay shaper brush dipped in water. Picture 8b
And for final smoothing use a clay shaper brush dipped in water. Picture 8b
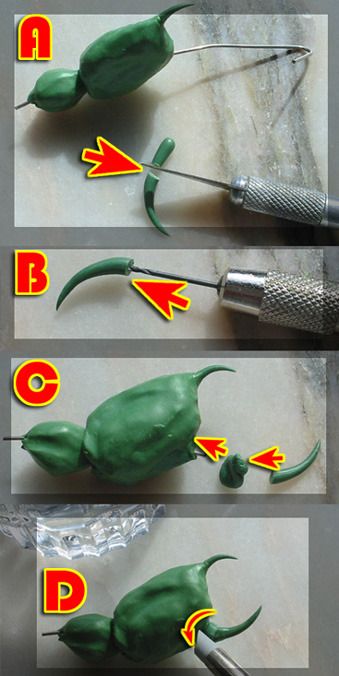
Lets move to the final claw spike and this time we will use the paper clip extremity for a stronger structure. First with a cutter do a cut on another spike and then use a pin vice to do a small hole in it. Mix a bit of green stuff and squeeze the spike against it passing the hole on to the paper clip. This should make a stronger bond, but before you finish you need to smooth the greenstuff with a clay shaper dipped in water. Picture 9
Step 5 (Texture)
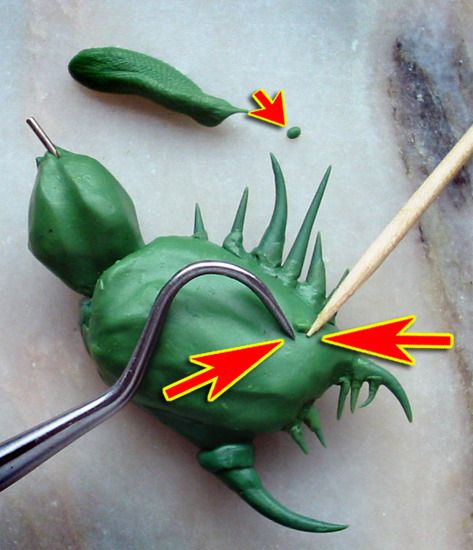
With all shapes finished its time for texturing those legs. I started by putting some spikes on the legs, since you already sculpted several spikes just cut them to the desired size and use green stuff for gluing them to the leg. In this process I use mainly sculpting tools and a toothpick dipped in water to sculpt the junction of the spike to the leg. You could also use pins but since the spikes are small there’s no need for that. Picture 10
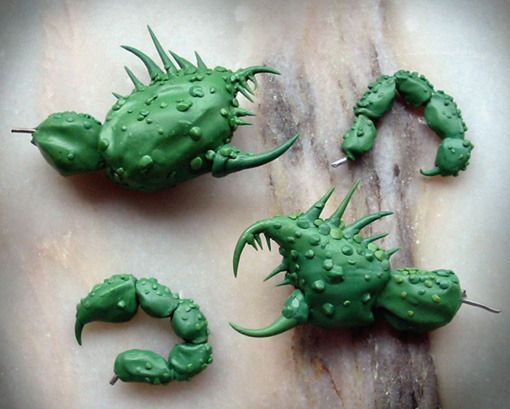
Almost there, now simply cut several random sized balls of green stuff and again with the help of a toothpick and sculpting tool stick and smooth them randomly on the crab leg, also try to make the balls on the leg interesting and natural. Picture 11


Hey keep posting such good and meaningful articles.
ReplyDelete^ god, I get these annoying spam comments too. I don't even know what the point is? Are they selling something? What? Or just trying to manipulate Google PageRank?
ReplyDeleteAaaaaaanyway, these turned out great - spiky and horrible looking! And of course a helpful technical walk through as always. I like your use of a real shell on the end product too :)
I dont understand the spam either so I always delete them as much as I can, its a bit weird I agree.
ReplyDeleteGlad you liked it Allison. You cant beat mother nature for all kinds of mental detailing on things. I could never replicate that in greenstuff its just soooo intricate.