
With this in mind I was searching on the web for futuristic bunkers and buildings for my scifi wargames, there are some nice options and not that expensive in 15mm, but things start to accumulate and 1,2... 10 buildings later and you have a fat bill just on terrain. If go to 28mm the bill is so huge that filling a gaming table is something your wife will not like.
Even if I will get those buildings sometime down in the future I decided, this time, to scratch built my own terrain and in the process make small tutorial.
How to create a Scifi Bunker
Intro
- The idea: Want some generic scifi buildings to decorate my table. These should be generic enough to fill several different roles, from Bunkers, storage facilities to command and control buildings etc.
- The scale: 15mm ( but you can adapt this tutorial to 28mm or 6mm ).
- The setting: General scifi with a twist of post apoc ( this way it covers several different genres).
- The mission: Cheap, fast and simple terrain but that looks nice.
The random Beginning
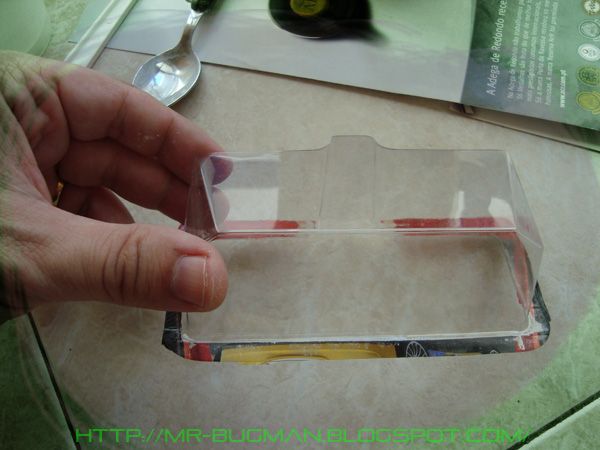
- I was thinking on some generic shapes and planning a sketch or two maybe a brainstorming but at the end of the day it was all a big accident. My 4 year old son loves disney toys cars from the movie Cars and I was buying him the 100000000th car at disney store and noticed the blister package of the car I got for him... Shazam! The shape of that plastic was just perfect and instead of trashing it I upgraded it to my bitz box as the future mould of my Bunker.
The material

- Some glasses for taking measures of portions
- A plastic knife or other flat tool to scrap the excesses
- A spoon to mix things up
- Plaster
- Paper on the floor because its going to be messy
- The Uber mould from cars toys blisters
Casting the bunker

- Read plaster intructions for ratios of water and plaster needed to have a milky cream consistency

- Add water and plaster to the mould and mix it with a spoon, then smooth things and take off excess plaster with the knife... There will be some bubbles on the wet plaster, remove them by tapping the mould gently several times until all of them burst.

- Cast as many as you wish, I was happy to have 3 casted before reforming the blister to its well deserved rest into the trash bin.
Decorating to your taste
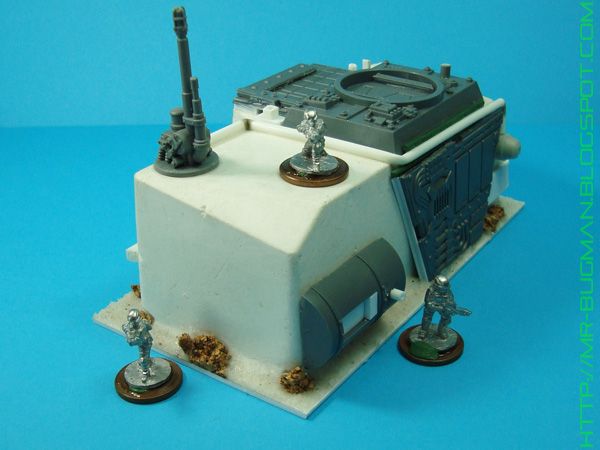
- This part is personal and depends on the bits and pieces you have stored in your bitz box, the older the wargamer you are the bigger is your box. I had some plastics from hexagon kits and some GW plastics and some plasticard etc... Fear not if you don't have a bitz box... go hunt for your wife cleaning products or your kids broken toys and if all fails cut some cool geometric shapes from cereal boxes card... You don't like cereals? your doomed XD. So here you go my first scifi storage bunker with a bit of post apocalyptic thing going on.


Conclusion
- Timing: One weekend.
- Money Investment: 1 euro on a Kilo of plaster and random bits from bitz box.
- If you go wild with decorations and start buying expensive materials like etched brass the bunker will look even better but a lot more expensive
Hope you guys liked it, soon I will paint the Bunker and will post it here with all the paint formulas...
Awesome idea using a blister as a mould like that, something that just never occurred to me. I shall be on the lookout for something similar now!
ReplyDeleteI just got to disney store again and got another different blister for a very big bunker... My son is also liking this blister hunt :)
ReplyDelete